MAKE A CONFETTI LAMP.
This project is simple and you probably have most of the things needed to make it in your house right now. It's a glitter-style lamp but with little bits of confetti in it that swirl around in the liquid when heated by a lamp.
One thing that makes this project quite special is that it is adjustable to be very sensitive to liquid movement, so it actually works with the low heat from a common 1W LED lamp! It can also be used with ordinary tungsten lamps for a faster confetti movement.
Technically speaking you could even make it out of a plastic bottle if you were using a low wattage light source.
This is actually a pretty safe project. I mean, I suppose you could cut yourself with the scissors, asphyxiate yourself with the plastic bag or electrocute yourself with the light you used to heat the bottle, but that would all take a reasonable amount of effort. However, as with all projects on this site you do it at your own risk.
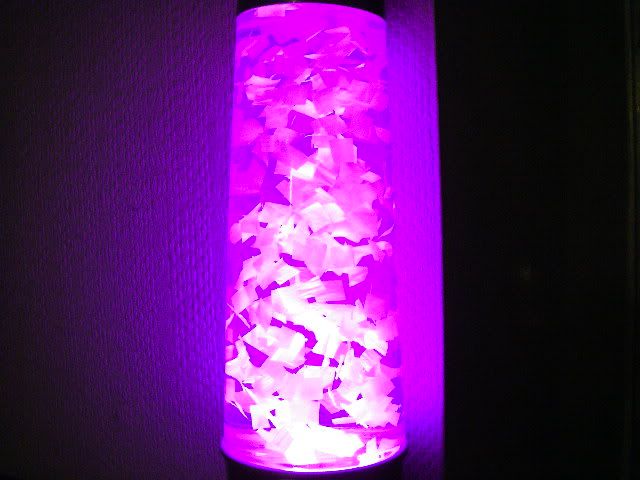
This is what the finished light looks like.
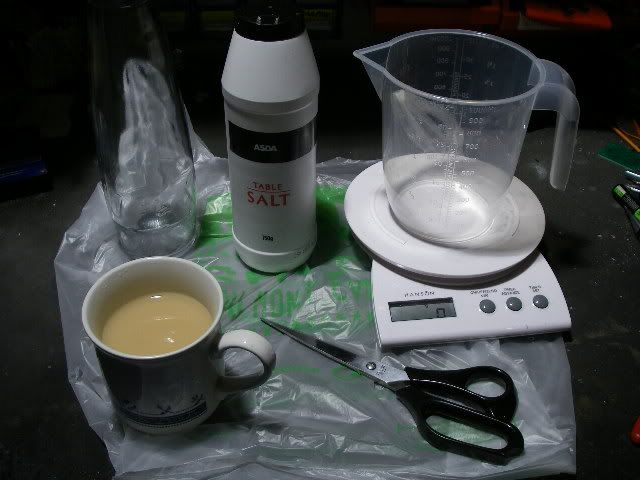
You will require a polythene carrier bag, a pair of sharp scissors, a suitable bottle (I used an existing lava/glitter lamp bottle), a set of weighing scales, a jug, some salt and a cup of tea or coffee.
Fill the kettle, boil it and make yourself a hot drink while leaving the remainder of the water in the kettle to cool down. We'll use the pre-boiled water later, because the boiling not only sterilises it but also degasses it too.
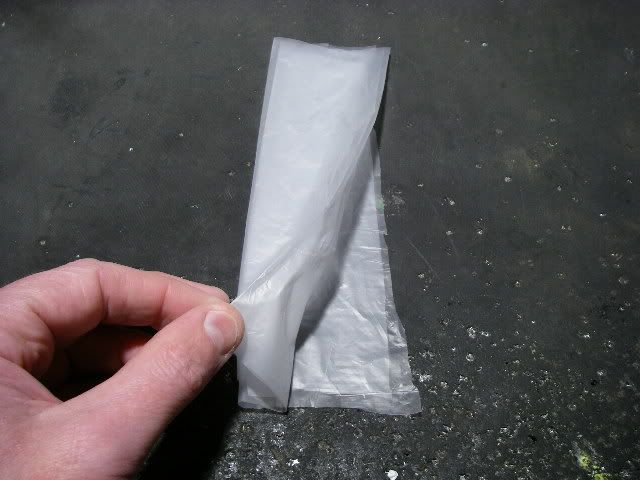
Now cut out a large square of the polythene carrier bag and fold it in half and then half again longways. The multiple layers will make it easier and faster to cut into small squares.
Try to find a bag that is not too transparent as it looks better if it has a solid colour. I recommend white as it means you can use a coloured lamp to light it.
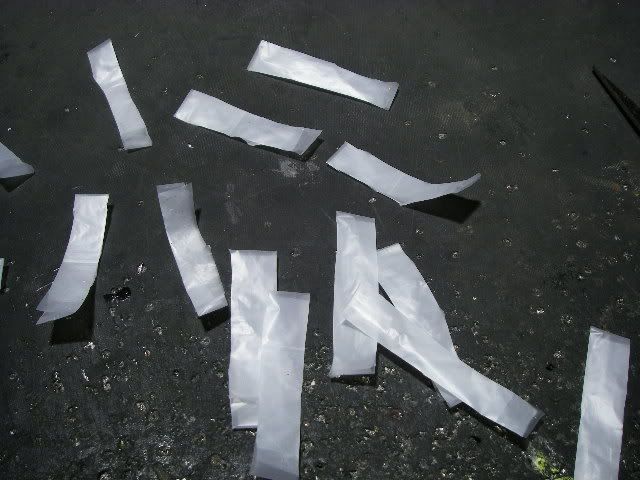
Now we trim off the ends and cut the large strip into small strips about 10mm (3/8") wide. You could actually make the strips thinner if you wanted, but small flakes of polythene get very annoying very quickly due to the effects of static cling.
Incidentally, we're using polythene because it has a very close weight (specific gravity) to water. There are many different plastics and they all have different weights. By choosing polythene we can balance the solution with salt quite easily to make the polythene confetti buoyant.
.
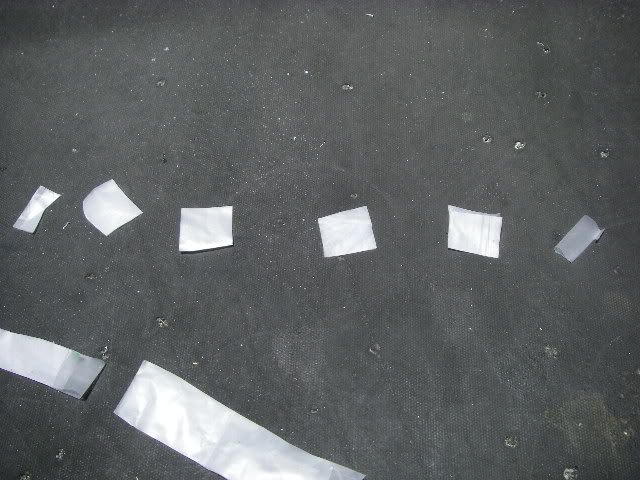
Now cut and discard the end of a strip and then cut as many squares as you can from it, while also trimming off the other end. The reason we trim the ends off is because the plastic is folded there. Each of those squares is actually four squares sandwiched together.

Do the same with all the other strips and put the resultant confetti in a tub. This may be where you may discover the delights of static cling as it sticks all over your fingers and refuses to go into the tub!
Make as much as you want, but note that it should all be from the same bag to ensure a consistent weight.
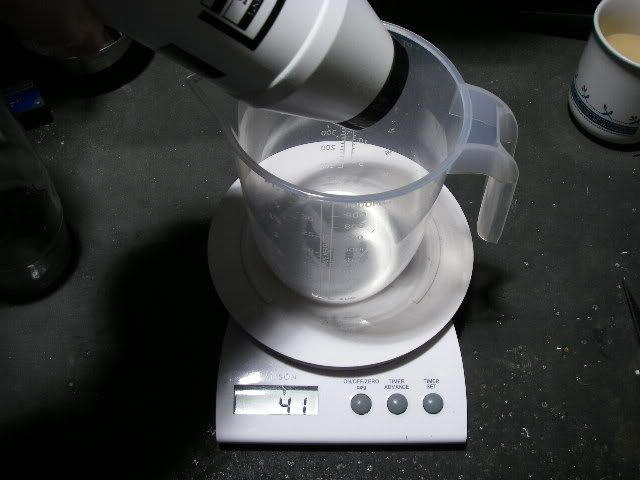
The solution we will be using is a mixture of salt and water. In my experiments I found that the ratio of salt to water was around 40grams of salt to 500ml of water (1.6oz salt to a pint of water). This should be slightly less salt than needed, as it's easier to start with the confetti at the bottom of the bottle and gradually add salt until it gets buoyant, than the other way round.
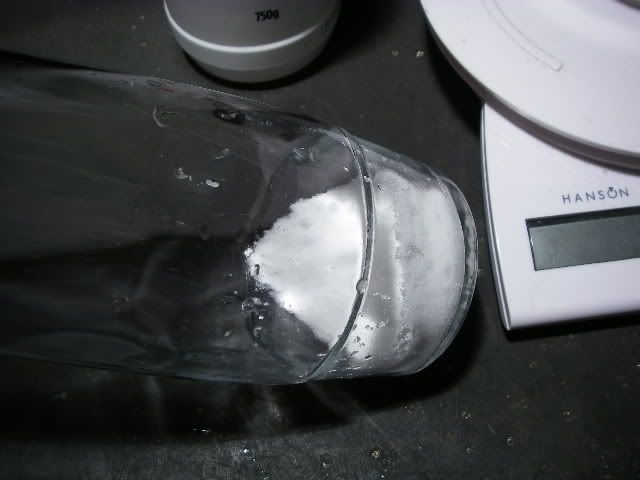
My bottle was conveniently 500ml, so I just poured 40g of salt into the bottle, but you may find it easier to pre-mix the salt and water and then pour in as much as you need.
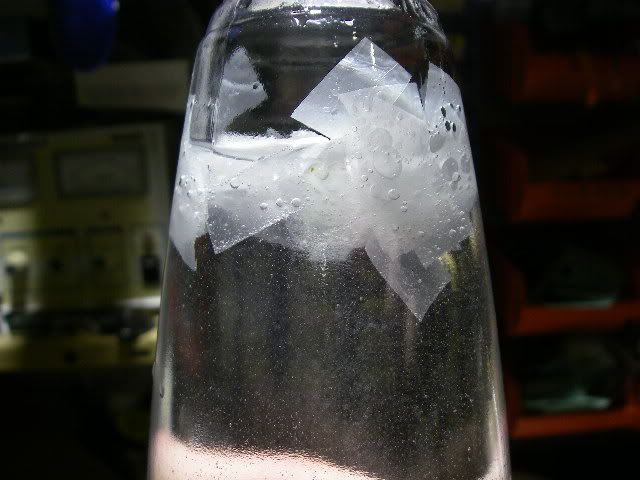
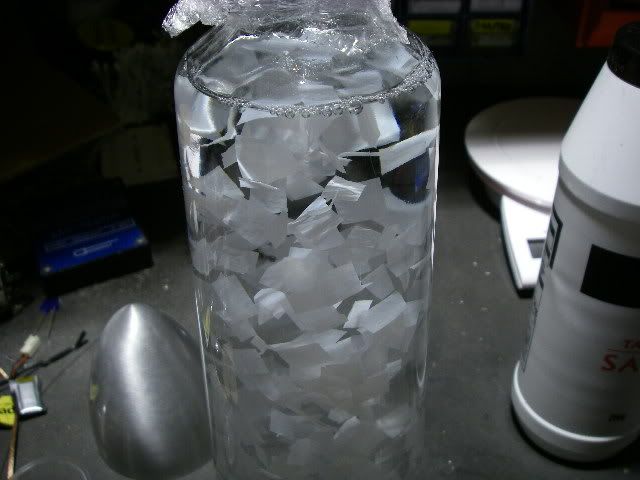
Now shove the confetti in through the neck of the bottle. You may wish to separate the individual bits by rubbing them between your fingers first. This is a very fiddly bit!
Then shake everything up to mix it and thoroughly wet the confetti. It will all now float to the top and steadfastly refuse to sink! This is because it has air bubbles trapped on its surface, and the liquid will also have gas trapped in it. (This is one reason we boiled it first.)
The only thing you can do now is wait, and by wait I mean days or longer. The bubbles will gradually subside and hopefully the confetti will eventually start to sink. Just be patient, because if you try to adjust the solutions density too soon you'll just end up having to add more salt later to make it denser again.
Here's one I made earlier. Once the confetti has stabilised in the liquid you can adjust the density by adding more salt to make it neutral so that the confetti just hangs in the liquid. If it refuses to sink at all then you may have to try and pour out some salt water and replace it with plain boiled water.
And here it is lit again. This is being illuminated with a mains powered 1W LED lamp with a mixture of red and blue LEDs. The lamp only runs warm, so the movement is very slow. If you want faster movement use a tungsten lamp underneath the bottle. Don't go too high though. 25W is ample.
If you intend to use a high wattage lamp then you may need to use less salt so that the confetti floats to the surface when the lamp is cold. This is because the fluid expands as it heats up and gets less dense.
If you build this from scratch without an existing lava/glitter lamp base, then you could consider using a GU10 or MR16 style downlighter mounted in the top of a box (or shelf) to form a simple illuminated base to sit the bottle on.
Here's some video of the lamp in action with a 25W lamp.