MAKE NIXIE STIX.
This is an unusual project which involves a string of neon lamps in parallel that flicker and jitter about randomly. I think I discovered this effect back in 2003 when I was playing about with neon relaxation oscillators. I tried hooking a load of neons in parallel with a single resistor, knowing that whichever neon lit first on each half wave of the mains supply would clamp the voltage and stop the others from lighting. Ideally the strike voltage of the lit neon would have risen as it warmed up and resulted in another neon lighting, and hopefully resulting in all the neons randomly flickering. Alas, it turned out that such a simple circuit didn't work, since the first neon to light seemed to stay in an excited state and would just steadfastly stay lit.
I started experimenting with ways to make the neons flicker about, and after various circuits that ranged from simple diodes in series to half wave rectify the supply and make it "choppier" and latterly pulsed triacs to see if whole cycle chopping worked, I ended up back with a simple relaxation oscillator circuit. After some component juggling I came up with the following project.
Note that although this project works with the neon lamps I use, it works in an odd way and may not work with other brands of lamp. I've never had an opportuinity to try other sources of neon lamps. It would be good to hear if others try this and have good results.
This project involves mains voltage and should only be tackled by those confident in this area. You tackle this project entirely at your own risk.

So here's the end result of this project. It's a clear plastic stick filled with neon lamps that jitter about randomly inside it.
In this case I put a standard bayonet-cap lamp end on so it could be plugged into a lamp holder, but I've made other versions with a flex going straught into a bit of flexible tubing filled with neons.
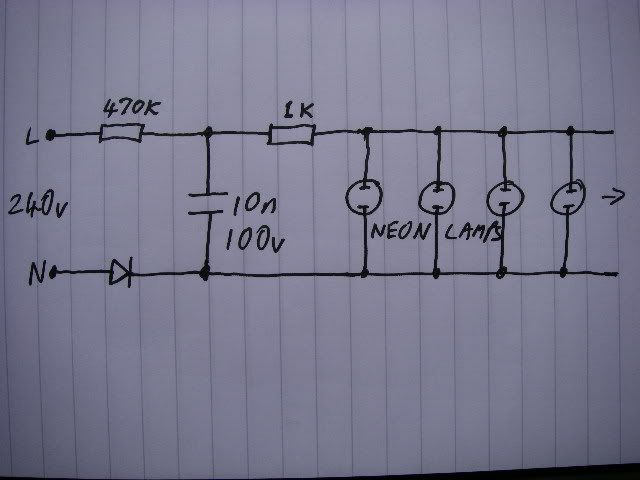
The circuit is breathtakingly simple. The 470K resistor (100K for 110V supplies) and the 1N4007 (1N4004/5/6/7 are all suitable) diode charge up the 10nF 100V capacitor until a neon lamp in the parallel circuit strikes and discharges the capacitor via the 1K resistor. the 1K resistor is there to limit the current through the neon lamp as it discharges the capacitor.
The capacitor only has to be rated for 100V because a neon will typically strike at around 90V, pulling the voltage quickly down to 50V before extinguishing.
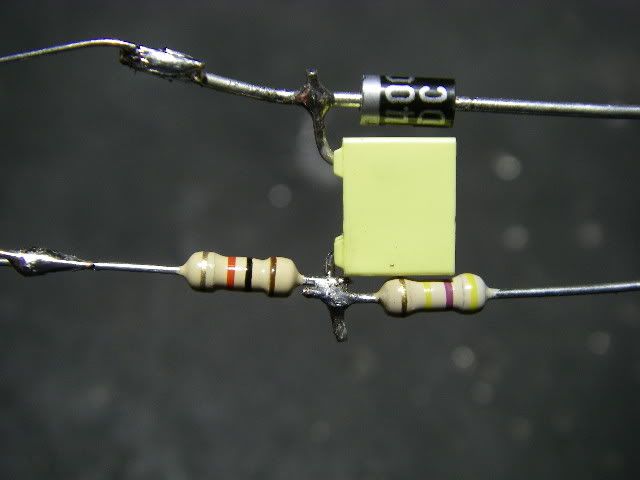
And here's the circuit in real life. How easy is that!
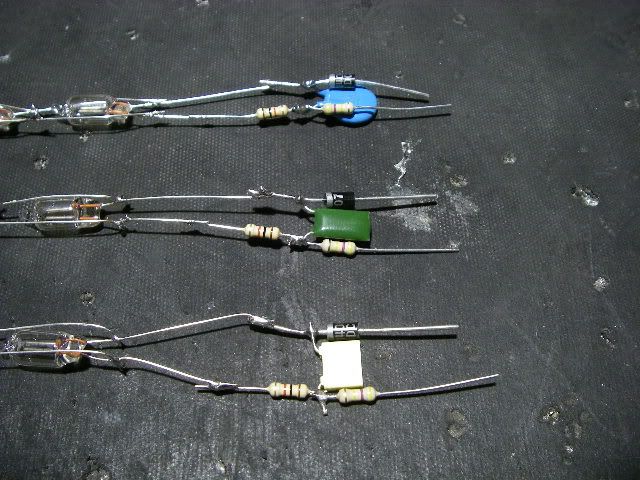
The same circuit made with a random selection of 10nF capacitors.
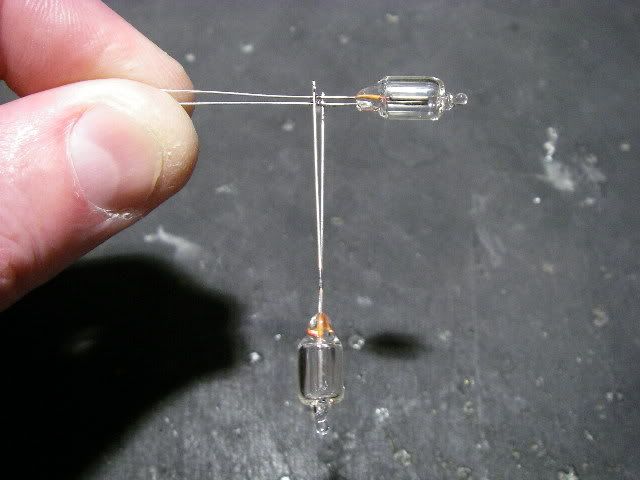
For chaining a load of neon lamps together in parallel I initially soldered them at right angles as shown...
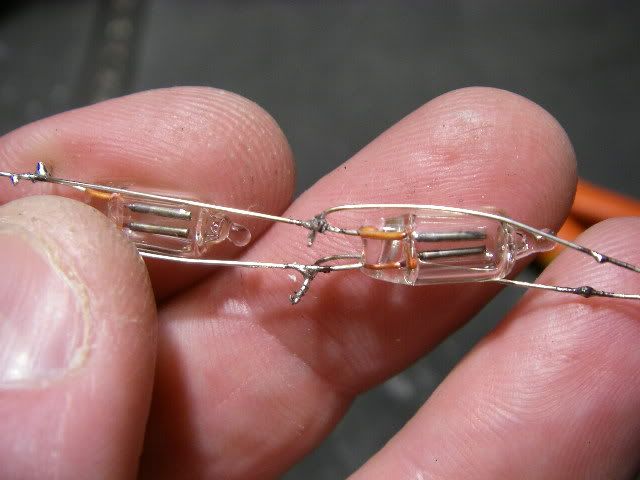
Then folded them back and soldered the next one on.
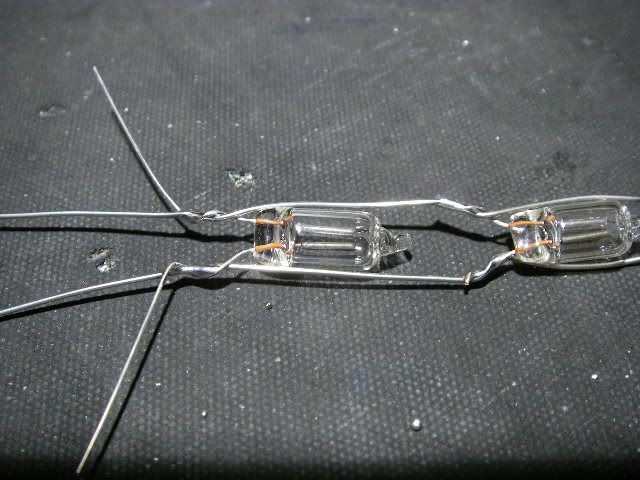
However, latterly I realised it was MUCH easier just to get a couple of bits of wire and wrap and solder the leads of neons at regular intervals along it.
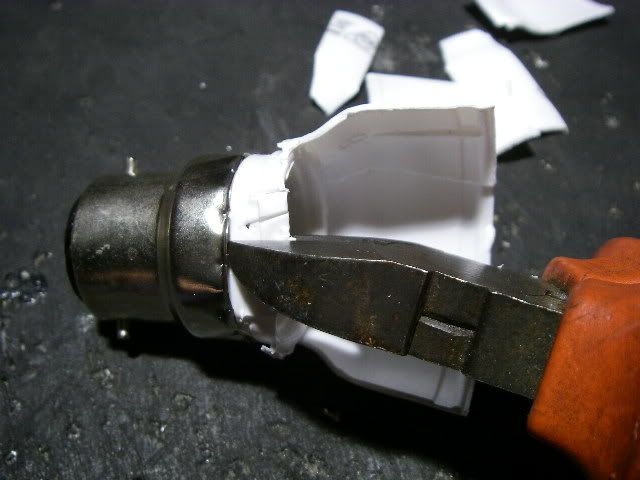
For this project I hacked the base of an old compact fluorescent lamp for it's bayonet cap end. In the UK we use more bayonet cap lamps than screw-in types.
I cut away all the plastic to leave the metal cap and contacts.
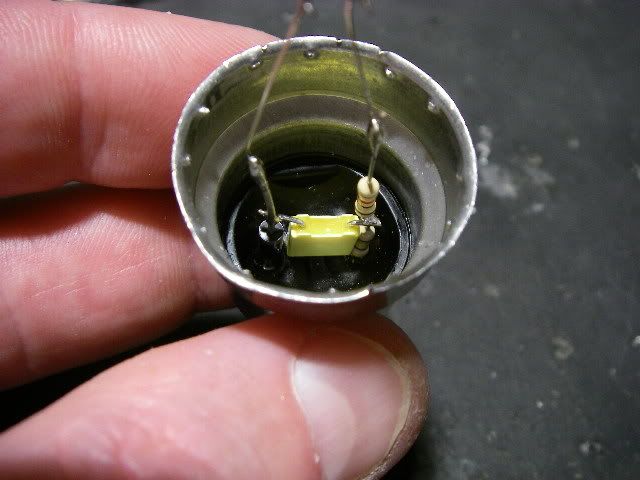
Then I soldered in the resistor and diode leads into the lamp holder contact positions.
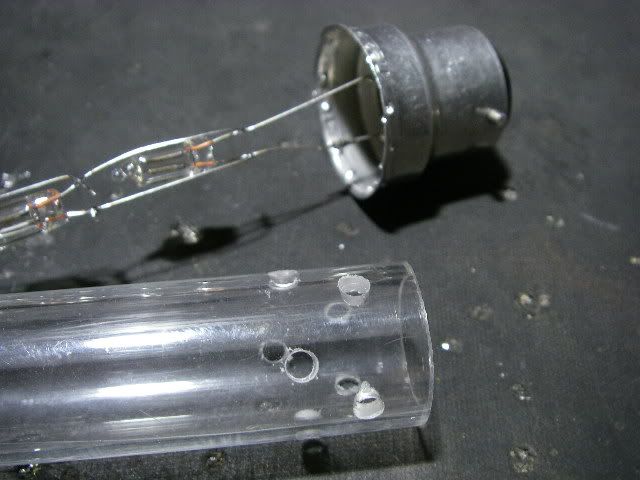
I got a bit of plastic tube that fitted rather well and drilled some holes in it to allow resin to flow through when I glued it into the cap, and make sure it couldn't pull off.
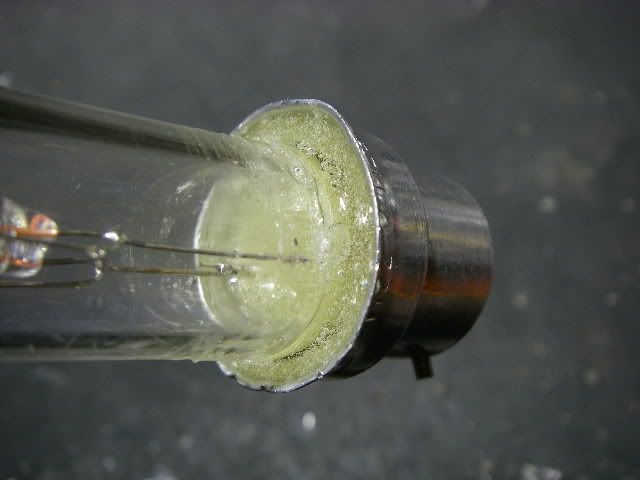
Then I mixed some two part resin, poured it into the cap and then sat the tube in and let it set.
After the glue was set the tube was ready for use. It looks great. I've put a video of it in action below.