MAKE LED "CHARM" LIGHTS.
I'm not sure if it was a global phenomenon or if it was just a UK thing, but "charm" wrist chains used to be all the rage. These were bits of chain which were worn on the wrist, and adorned with all manner of collectable "charms" that simply hooked onto the chain.
This is the LED version, and uses a random selection of coloured transparent plastic/acrylic objects which have LEDs inserted into them for plugging into a special wiring loom.

Here's a picture of the finished project to whet your appetite.
You can plug new illuminated "trinkets" into the loom as you please.

To start with, you twist together two thin stranded wires to make the wiring loom with.
These wires are standard electronic interconnect wire rated at about 1.4A. In the UK this wire is described as 7/0.2mm equipment wire, since it has seven strands of 0.2mm CSA (Cross Sectional Area) wire. It's pretty standard stuff.
You want to choose two colours to represent the positive and negative cores, while still blending into your chosen application.
Although the wires in the picture above are black and grey, I actually chose green (-ve) and brown (+ve) for this project so that the finished arrangement could be draped around a bush or tree unobtrusively.
You want to twist about 15 feet (4.5m) together. The best way being with a cordless drill as shown above.

After twisting it, you cut the wire into 11 X 12" (300mm) lengths and cable-tie them together to form a loom with a series of short 1.25" (30mm) tails as shown above.
These are going to be the plug in points for the lights.

Strip the negative wires and crimp or solder on a Molex style socket contact, then cut the positive wires back as shown, and strip and solder them together.

An offcut of the positive wire is soldered to a 220 ohm resistor, which is then soldered to the positive tail.
The set of lights is designed to run from a 6V supply, so the 220 ohm resistor has been chosen to limit the current through the LED to an appropriate level. For a standard red/orange/yellow LED with a forward voltage of 2V, the resistor will drop 4V giving a current of about 18mA. For a blue/green/white/UV LED with a forward voltage of 3V, the resistor will drop 3V giving a current of about 14mA.

The resistor is sleeved in heatshrink, then another Molex style socket crimp is applied to match the negative crimp.

The negative crimp is inserted into a two way socket shell, given a quick twist to keep the wire neat, then the positive crimp is inserted too. Remember to keep the positive in the position marked by a "1" embossed on the connector shell.

The cable-tie is removed, and that's a single LED socket complete.
Now do the other nine! :-)

The two ends of the wiring loom are cut back to about 5" (125mm) long and a small 0.1" (2.5mm) pitch Molex connector is added to each end. This is to allow you to add extra sets end to end later if desired.
The use of three way connectors is to avoid confusion with the two way connectors used in the rest of the loom.
The Molex connectors have a "1" embossed on the socket to assist in identifying the pin numbers. I tend to use this pin as the positive connection. Ensure that you observe polarity throughout this project to make sure the LEDs work.

A motley selection of coloured (or clear) transparent plastic objects are gathered together for conversion. The above picture shows a couple of decorative plastic crystals, a rubber bouncy ball, a plastic sea shell from a wind-chime and a short length of bubbled acrylic rod from a flashy LED gimmick.

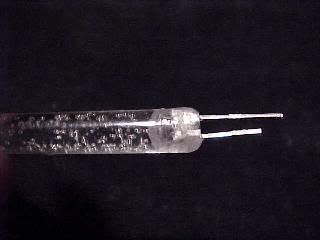
A shallow hole is drilled into each object in an appropriate position to accomodate the LED. For these small objects a 3mm LED seems the most appropriate, but you can also use 5mm LEDs in larger objects.
It may help to make a small indent in the chosen position, by touching it briefly with the tip of a soldering iron. This will help stop the drill skidding off as you start to drill the hole.
Being very careful not to drill your fingers in the process, drill a hole that is a slightly larger diameter than the LED, and is at a depth where the LED can be inserted almost completely. To help ensure a good clean end, it's worth letting the drill skid gently against the end of the hole when you've drilled it deep enough. This will help polish the end slightly to ensure that the maximum amount of light gets into the object.

Mix up some two part 5-minute epoxy resin, and carefully apply a small amount into the end of the hole with a bit of wire. You want to wet the internal surface of the hole with the resin, and leave enough to squish up round the LED when it's inserted. (But not too much!)
It actually takes a modest amount of time to get the glue and LED into position, so don't mix up too much glue at once. Allow about 1 minute per object. If you've got lots of patience, then you could use a much slower curing glue to allow more to be done at once.
If the glue starts to "gel" while you're still applying it to objects, then stop immediately and mix a new batch. You'll know when it does it, and this is the point it will stop flowing properly around the LEDs.

Push the LED in so that it displaces the glue. There might be a small pop noise as the trapped bubble of air escapes. Try not to trap any air in the hole, since this will affect the amount of light that gets into the ornament from the LED.
Because the resin mates the LEDs resin case to the plastic object, the lens effectively vanishes, and the LED chip becomes integral to the object. This means that the whole object tends to illuminate brightly.
Always use an LED that matches the colour of the object, since LEDs tend to emit a single wavelength (colour) of light, and it's easy to filter it out with a colour mismatch.
Smooth walled objects don't look as good as rough walled objects. The more ripples and ribs there are in the surface pattern, the brighter the object will look. The shell is a good example of this.

The objects are pressed into a strip of blue-tack to allow the resin to set without dribbling out. Be patient, as it's better to let the resin fully harden before handling the objects or plugging them in. If the resin is disturbed while tacky, then it may frost slightly with torsional movement, and this will lower the light transmission.
Once the resin has cured, the leads are cut shorter, ensuring that the longest (+ve) is left a bit longer to identify it. The LED leads can either be plugged directly into the Molex connectors, or for extra protection against wrong insertion (LEDs are polarity sensitive), the leads can be soldered to a matching Molex pin header which is keyed so that it can't be inserted into the socket the wrong way round. Otherwise, if you're just pushing the LED leads into the socket, make sure that the longer (+ve) lead gets put into the +ve side of the connector. The low operating voltage of the set (6V) should help avoid damage to wrongly inserted LEDs, but it's better to be safe than sorry.

The set of lights is connected to a 6V supply which can be a cheap unregulated plug in power supply (a wall wart). The existing connector can be cut off and a three pin Molex socket added to match the end connectors on the string of lights. Be aware that with a low load the unregulated voltage will float up higher, so it's better to use a lower voltage setting like 4.5V to allow for this. The set of 10 lights will take a maximum of 200mA, so while a standard 300mA adaptor will happily run a single string of 10 lights, it will be necessary to use a higher current adaptor if you chain a few sets together. A 500mA adaptor will run two sets of ten, while a 1A adaptor should happily run 5 sets of ten.

Here's a selection of the lights lit up. They look great and the fact that you can randomly plug different lights in anywhere on the string makes it a really pleasing project. You can just keep adding new lights to the set as you find appropriate plastic objects in your travels.