MAKE AN LED SIGN.
Make dazzlingly bright LED signs that run for hours on a small rechargeable battery pack or can be powered continually from a 5V plug-in power supply. These signs are deliberately very simple, offering a single fixed message at good intensity with no complex electronics. Perfect for giving your name the Las Vegas treatment.
I did my first version of this modular sign system in 1993, but modern LEDs make it so much better.
These panels can also be used to make a low voltage floodlight.

The first sign under test. It's dazzling, and amazingly it runs off just two AA rechargeable cells for over eight hours at full intensity!
The character height is 3.5" (90mm) making these signs very readable from a distance.
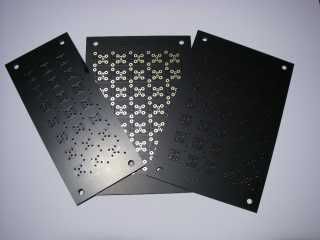
There are two circuit boards for this project. A full five by seven matrix for most alphanumeric characters, and a slimmer three by seven matrix for narrow characters like "I" or "1". Each LED position has its own resistor allowing any or all of the positions to be populated with LEDs.
Here's a guide to help you with the placement of the LEDs. I've shown the narrower PCB being used for slim characters. You can experiment with other characters too if you wish.
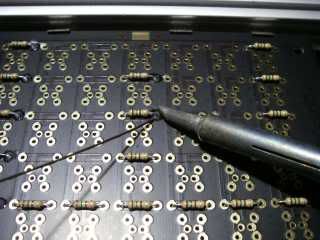
To start off you install the resistors on the back of the PCB. In general a value of 150 ohms is good for most applications up to 5V. You may find it useful to mark all the desired LED positions, keeping in mind that the image will be reversed when you turn the PCB over. If you do solder resistors into wrong positions then just leave them there. They won't affect the operation of the sign.
For use at 12V in an automobile or truck you can use 2200 ohm resistors or 1000 ohm resistors for a brighter sign, but be careful about dazzling other motorists.
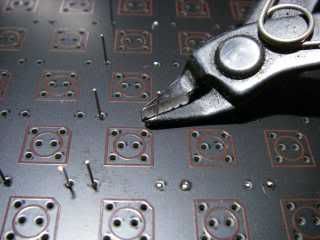
once the resistors are soldered in, carefully crop their leads flush with the front of the board. (This is why we didn't install the LEDs first.)
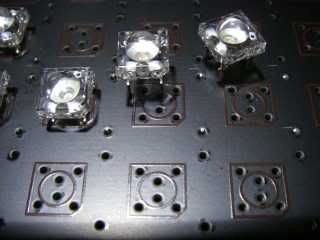
Now we carefully install all the LEDs, noting that there is a polarity chamfer on the corner of the graphic to show which way the LED should be put in. The Superflux LEDs have a matching chamfer on their casing.
This board is designed to accept 3mm, 5mm, 8mm, 10mm, 12mm and all standard single colour superflux LEDs. Two pin LEDs should be inserted with the short lead and flat on their package facing down towards the chamfer side of the superflux outline.
Apparently some of the Chinese Ebay suppliers are shipping LEDs with reversed polarity, so before you solder all your LEDs in it is well worth checking that the polarity chamfer does indicate the negative side. You can either use a 9V battery and a resistor, or get a dedicated LED tester which is available quite cheaply on the Internet.
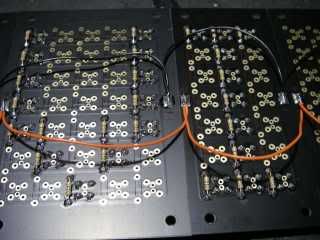
Now we hook the PCBs up by laying the PCBs out in the correct order and looping all the positive connections together and then all the negative connections together. The new version of the PCB has pads positioned to allow linking power across between PCBs for short sections.

After testing, you can mount the PCBs as required for your end application. To attach them to a flat surface you can put screws through the mounting holes with a suitable spacer like the 5mm nut shown above.
I did originally consider using connection pads around the mounting holes so that these panels could get power from metal mounting strips, but I decided it was going to be simpler and more reliable to avoid that route.
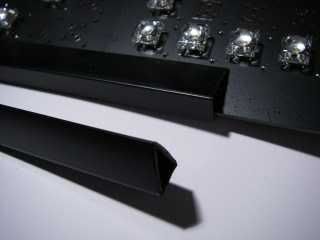
For a nice simple assembly you can use plastic strips designed for binding sheets of paper together. You can just push the sign panels into the strips and they hold them fairly tightly.
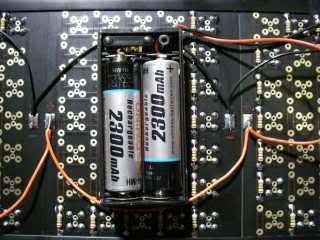
Although you can power the sign from a 5V supply like the ones for powering USB peripherals, I like the idea of self contained signage with an integral battery pack. This sign used 66 LEDs running at about 4mA each, so with the 2300mAh batteries shown, it lights for over eight hours at full brightness, then many more at gradually reducing brightness.
Two AA cells (2.4V) are OK for red or yellow LEDs, but for green, blue and white LEDs you will need to use three cells (3.6V).
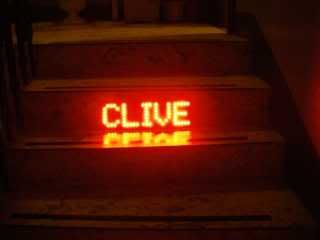
Here's the self powered sign on a staircase. It's actually TOO bright for home use and leaves dots in my eyes every time I glance at it!